


You may have heard about Facebook’s relatively new custom audience feature, but do you know what it does?
Custom audience is a Facebook feature that allows businesses to target contacts via email, user ID or phone number. If you advertise on Facebook, you know all the options you have for targeting your ad to your specific audience, however, the custom audience feature is arguably one of the most powerful options for targeting your ads. Let me explain how it works.
What’s so great about this feature?
This feature is really exciting because it allows you to target a group of people that are already familiar with your business. So all those emails of business contacts that you’ve been collecting over the years can now be put to good use on Facebook!
The other great thing about this feature is that it is pretty easy to set up and is currently free. I say currently free because it is likely that Facebook will charge businesses for creating custom audiences in the future.
How to set up a custom audience
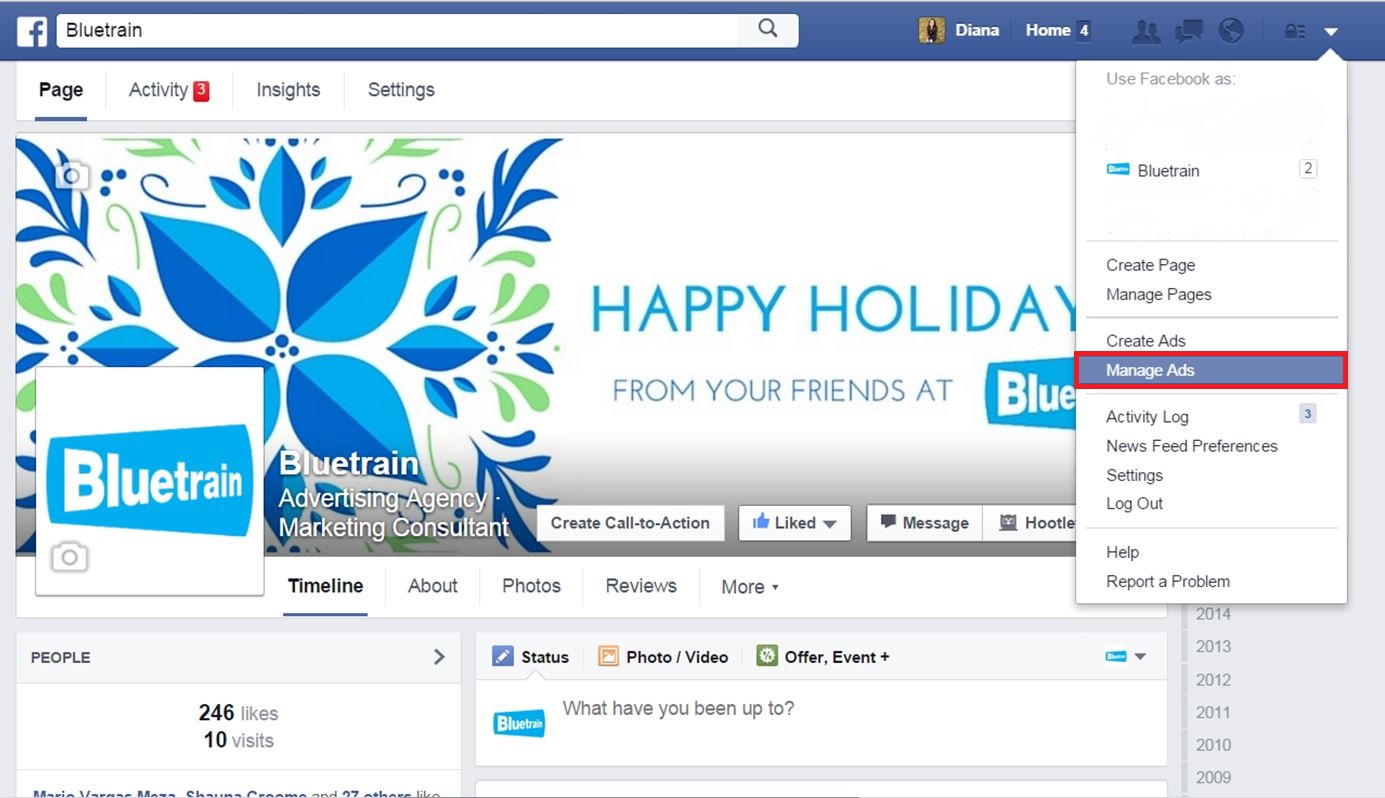
Creating a custom audience is pretty simple. Start by logging in to the Facebook account that is connected with your business page. From the drop down menu select Manage Ads.

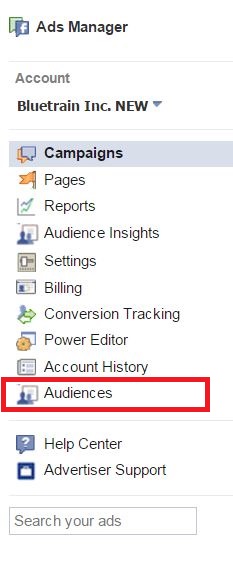
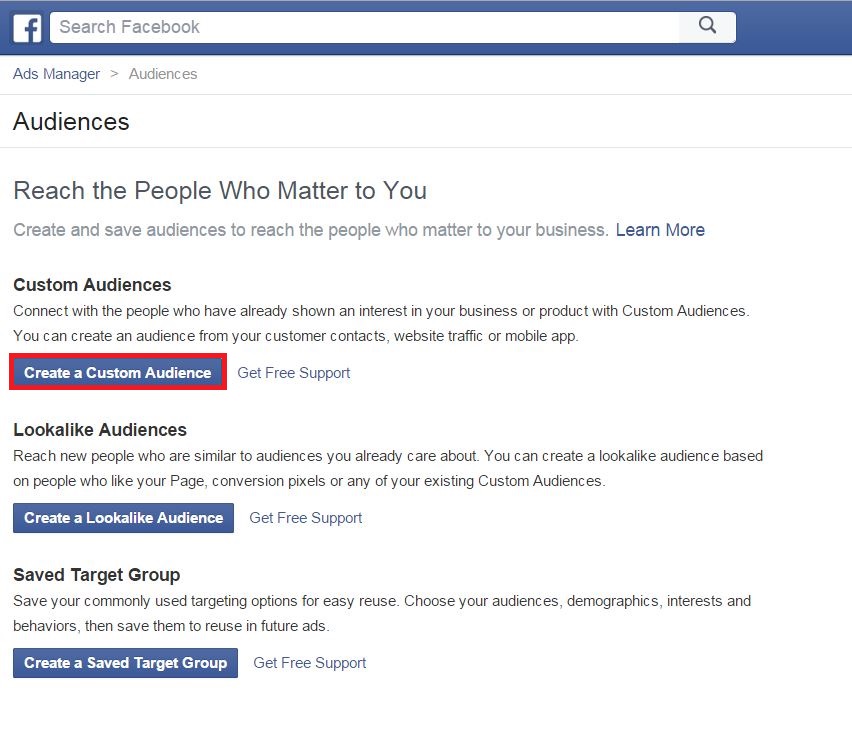
Next select Audiences from the left hand menu and then click the Create a Custom Audience button.


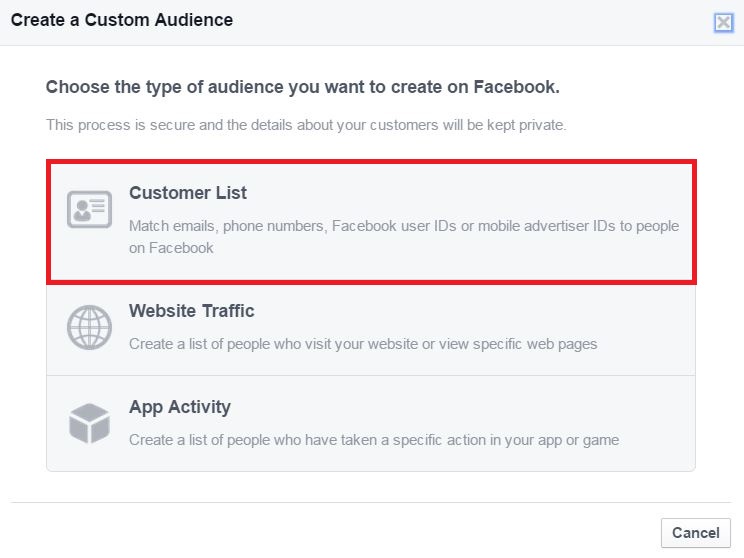
After you click on the Create a Custom Audience button a dialog box will pop up prompting you to select the type of custom audience you want to create. In this case we want to create a Customer List.

Then you’ll have a chance to select whether you want to upload a file, copy and paste your list or import from MailChimp (if you use that service). If you choose to import a file be sure that it is a CSV or a TXT file and that you only have one column in it with your emails, user IDs or names. Do not include a header for your data column.
Then you’ll have a chance to select whether you want to upload a file, copy and paste your list or import from MailChimp (if you use that service). If you choose to import a file be sure that it is a CSV or a TXT file and that you only have one column in it with your emails, user IDs or names. Do not include a header for your data column.


For the sake of this example let’s say we have our business contacts email list handy and can easily copy and paste the emails to Facebook.
Once you’ve copied your emails just click the Create Audience button. On the next screen you’ll be able to name your audience and create an ad targeted to that custom audience.
Privacy concerns
Before you create your custom audience it would be a good idea to read through Facebook’s terms for the custom audiences feature. Like most terms and conditions pages it’s a lot to digest, but essentially it says that:
- All the information you share will be encrypted before being sent to Facebook.
- You’ve collected the information lawfully and with due consent from the people who make up your custom audience.
- The people on your list have not previously opted out of this kind of communication or have not unsubscribed from your list.
- The information you share will only be used for data matching purposes and will not be shared with third parties or advertisers and will be deleted once the match is complete.
- Facebook can change or suspend this feature at any time and you can delete your custom audience at any time.
- If you are sharing information on behalf of a third party you must have authority from this third party to do so and the third party will be bound to these terms.
- You must be an advertiser (or an agency acting on behalf of an advertiser) to use the custom audience feature.
So, as long as your contacts have consented to receiving communication from your business and haven’t explicitly opted out or unsubscribed from your list, you should be good to create a custom audience for your next Facebook ad.
Let us know how it goes
Curious to try out your own custom audience? Go ahead and let us know if you run into any problems. Our bet is that it will likely turn out to be your best performing ad!